It’s my opinion that if you’re going to fill your home with smart devices, they need to be easy to control and monitor. Having to pull a phone out a pocket just to switch some lights on is annoying. Equally, having to open a browser just to see the state of everything is equally annoying.
Some people solve this by attaching screens to Raspberry Pis or old laptops and leaving them running a browser in kiosk mode, watching a carefully crafted Home Assistant dashboard. It’s not a bad method, but it’s also a bit … faffy. Monitoring a smart home shouldn’t need a multi-gigahertz computer. Also I want futuristic sci-fi information screens stuck up around my house. I don’t want a bunch of computers wittering at me about software updates stuck up around my house.
This is where openHASP comes in..
Control your home-automation devices from a customizable touchscreen UI connected via MQTT.
openHASP
It’s firmware for a wide selection of pretty cheap microcontroller based touchscreens. The kind of thing littering places like Aliexpress and eBay. I went for the Sunton ESP32-8048Sxx range of screens.
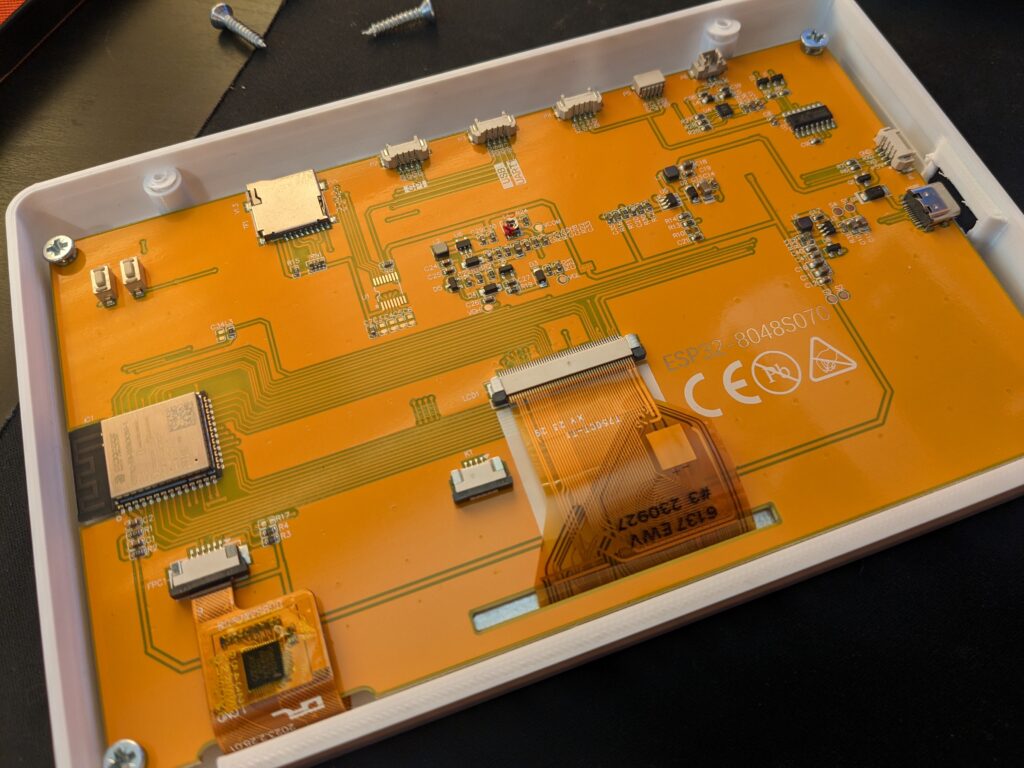
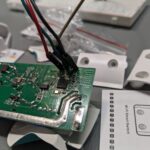
Mine has an 800×480 capacitive touch screen and an ESP32 inside it. It’s powered from either a battery or USB-C. I also managed to find a 3D printed case for it on Thingiverse.
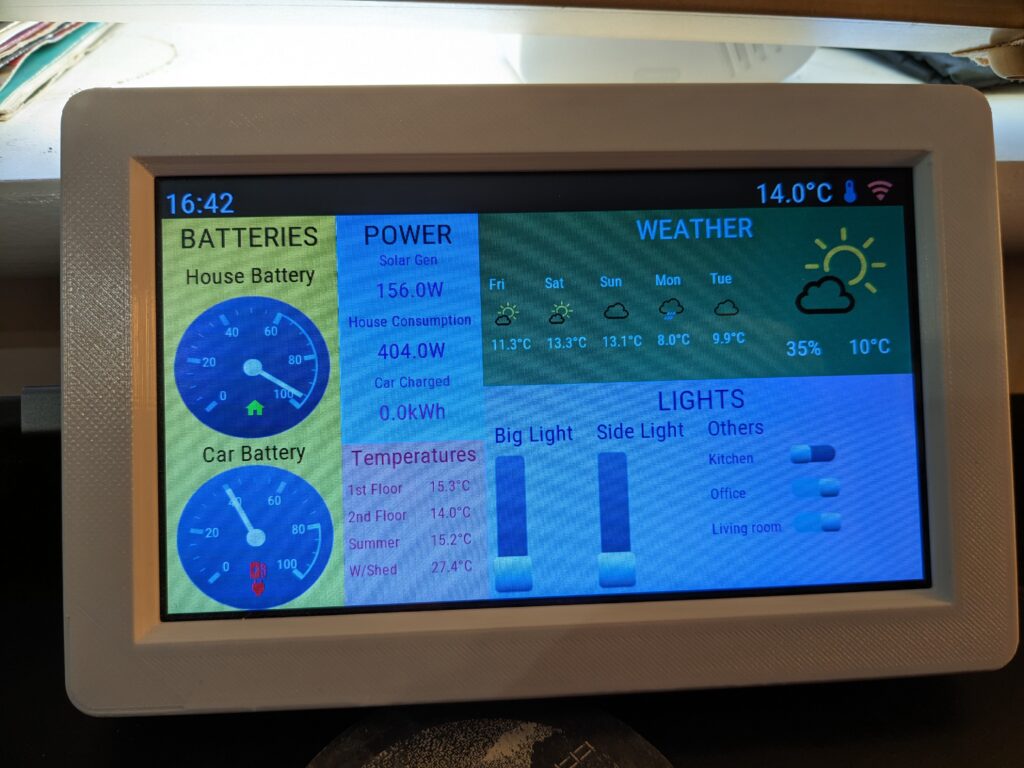
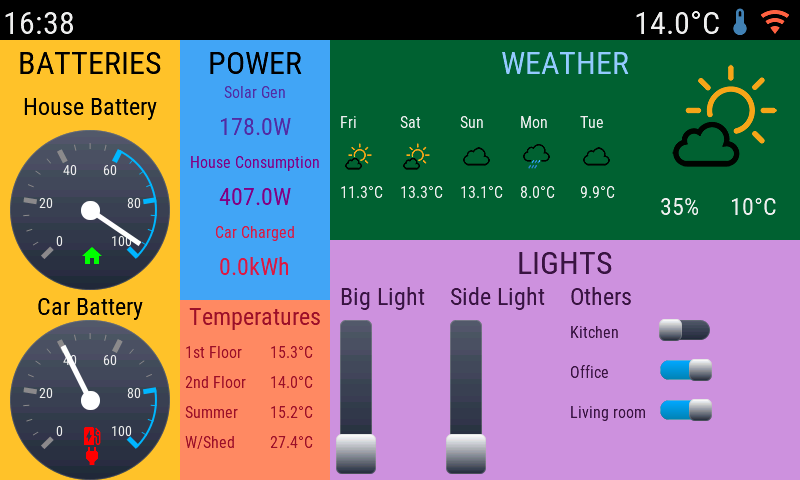
The end result is this little device that looks better than some proper home automation screens that exist
The really nice part is none of this requires any cloud accounts. It all runs either on the device itself, or talks directly with HomeAssistant over MQTT on your local network.
The screen can look however you want. There’s a large selection of widgets from simple text labels to colour pickers and images.
Designing a user interface is a bit of a painful operation however. You get this…
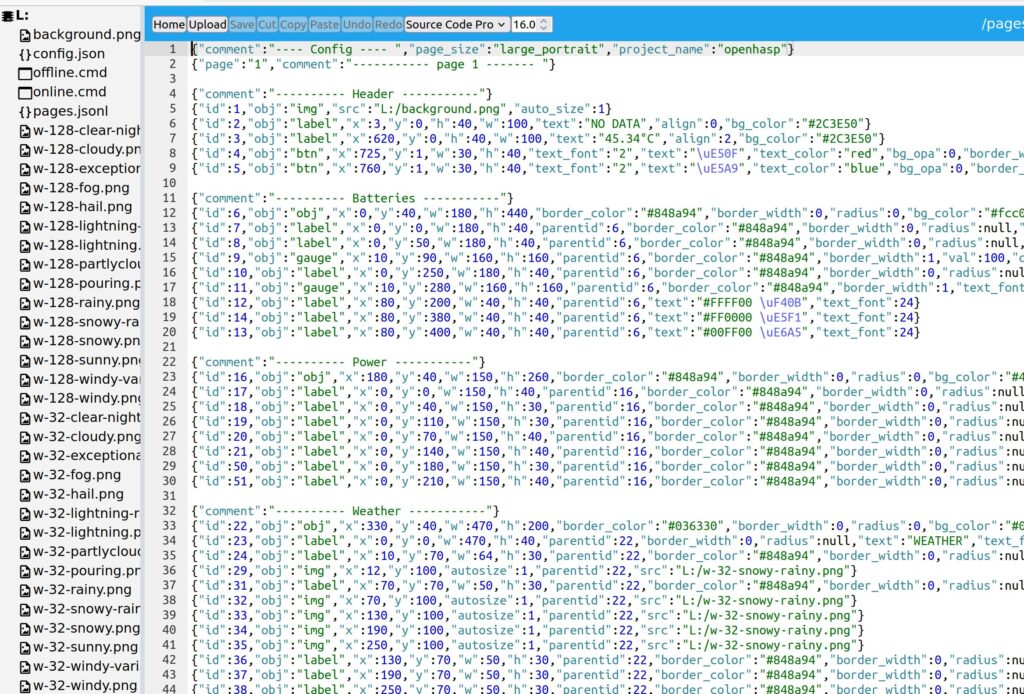
This is the file editor built into the firmware, and all those lines of text define the user interface. Are you able to judge pixel locations by eye? No, me neither. There’s a lot of trial and error in making a UI.
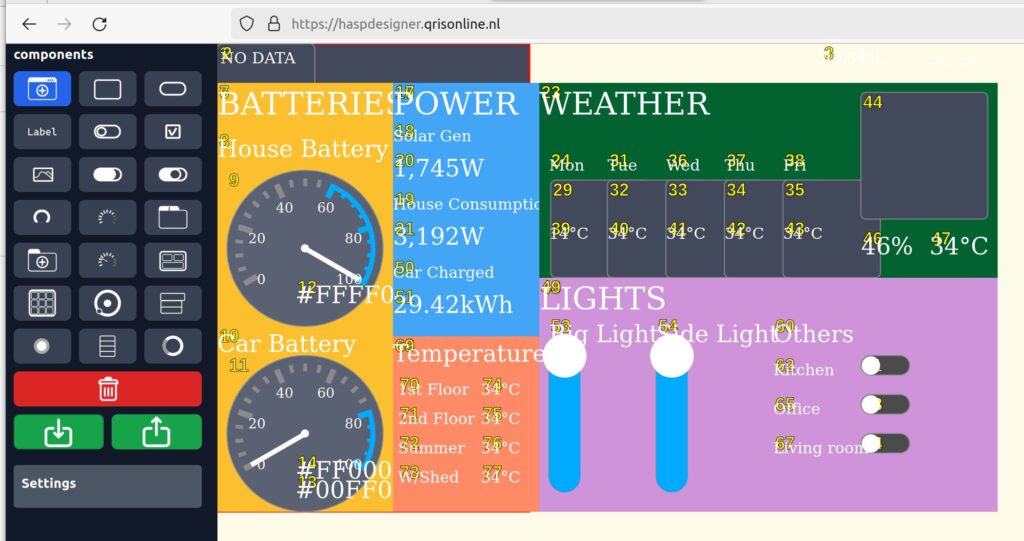
Fortunately someone created a design tool. It’s not perfect and doesn’t support everything, but at least you can position items in the general locations you want. I used it to get a general layout, then hand edited the code to fine tune where objects should go.
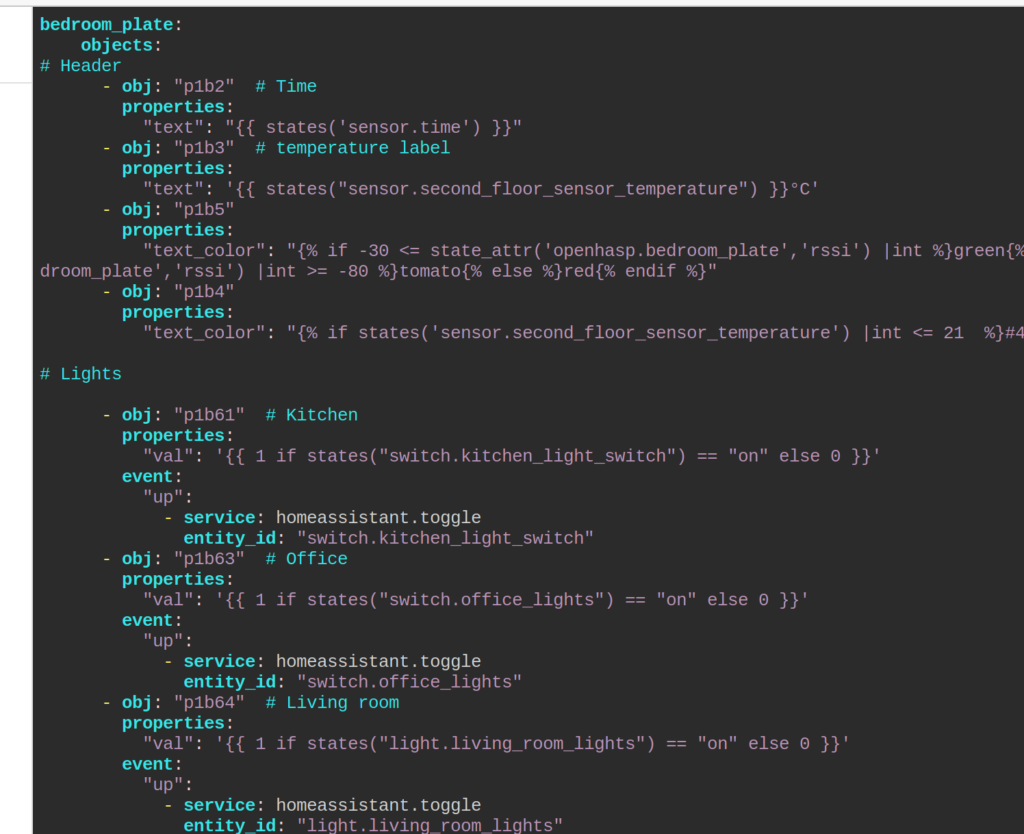
Interfacing with HomeAssistant requires an amount of effort too, editing text configs by hand to link each user interface object to something in HomeAssistant like a button or a value from a sensor.
The process is reasonably well documented on the openHASP website, but seeing the examples is a quicker way to figure out what to do. Expect to make a few botched layouts until things make sense.
The particular screen I bought also has a weird issue with either power delivery or interference. I set the theme to the built in dark theme and the whole panel became unresponsive. Also when uploading files through the web interface there’s some bizarre screen corruption that happens.
I’m now going to use this for a while to see how it operates and then probably buy a few more screens and set them up around the house. I’d like another main screen that can live at the bottom of the stairs showing information like this one. Then maybe a few smaller ones around the house for more specific data and controls.