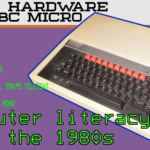
I set out to make a simple game using sprites for my BBC Micro. It turned into an unexpected learning opportunity for me.
My day job
During the day I teach kids computer science, and when we get to the tricky parts I often tell them to keep persevering and that they’ll eventually figure it out. I try to reassure them that it’s OK if you feel frustrated or that the challenge feels too difficult but it’s on purpose. Most of this is just me saying words to make my kids not quit, as I slowly adjust the difficulty of my lessons to match their abilities. Yes, lessons are scaled to match people’s abilities just like an RPG.
Little did I realise my own assembly programming attempt was about to get a full on experience of this, but without there being some benevolent teacher trying to slowly guide me towards eventual success. In my version success wasn’t guaranteed.
What I wanted to do
So I decided that it would be fun to make a small game for my BBC Micro. Previously I’d figured out how to make sprites work and foolishly thought it’d be a simple job to make a game. Except drawing and moving sprites on a BBC Micro is hard. The machine isn’t designed to do this. It’s designed to draw characters to the screen at specific locations, or to use built in routines for drawing lines and shapes. Directly pushing data into the screen RAM isn’t documented or encouraged.
I was fairly confident I could figure this all out though; other games exist so I knew it was possible. And with 30 years of Google results and countless PDFs of old programming books to look through I decided this would be more a test of my information finding skills than anything.
I found a way to draw sprites
After a short amount of searching I came across an old book that showed how to plot sprites to the screen and move them. They moved at a decent speed and the code looked reusable. All it did was copy pixel data to the screen at the correct offset. I decided it looked quite easy to follow and I was confident I would be able to adapt it to my needs.
But it didn’t work
I quickly discovered it had limitations – no screen erasing so sprites left trails or copies of themselves all over the screen. Moving the sprites quickly caused screen tearing and was visually unpleasant.
So I had to find a new way
Some better code was found on the stardot forum, but it was long, complex and I had to reverse engineer it to make sense of what was going on. Even worse, there wasn’t a demo program I could run and the code was written for an old assembler that didn’t seem to work properly any more.
Great, I either had a useful piece of code, or something that wouldn’t work. I wouldn’t know until it was running, but I couldn’t run it because I couldn’t assemble it so my only option was to reverse engineer the code and try to understand the algorithm behind it.
The new way didn’t work
I had to write all the code before being able to try it out, and the first run didn’t work! Neither did the many many attempts after that. At first it just crashed, then after a lot of debugging it drew garbage on the screen but the garbage looked consistent. I had no idea what the screen should look like when the code ran as I didn’t even have a screenshot to look at.
Eventually I realised the code was probably working, but something was wrong with the image data. Finding out what was wrong took some logical deduction. I could see something on the screen in distinct areas, moving in predictable patterns so I decided the code was probably running correctly, but the image data was either corrupt or loaded wrong.
I fixed the problems
The image data came from a file created from a sprite editor, and after finding the documentation for that sprite editor’s file format I worked out how to load in the images correctly. I even wrote a little converter script to do it for me at compile time.
And it worked!
Now I had a working sprite routine! It didn’t flicker, could cope with several sprites at once and even had a nice way to program the sprite behaviours. This wasn’t some quickly hacked together piece of code, it was a well created mini sprite engine! All I had to do was add it to my program, draw some new sprites, put it together to show off and check it functioned as I wanted.
Then it broke again, and I had no idea why
And I hit yet another major problem – somewhere along the way I’d broken it. Now sprites didn’t draw correctly at the top of the screen. Had I done all this work, only to meet a dead end that I couldn’t solve? I’d done nothing to the sprite code but tidy it up and try to draw the sprites at a different location. It still worked, but there were some strange drawing artefacts happening.
Crashing code is easy to fix, it stops at a specific point, finding that point is easy and the code is usually crashing due to bad data. Incorrect code is harder to fix, you have to look for clues. All I knew was the sprites went weird at the top of the screen, but worked fine everywhere else.
Frustrated debugging ensues
I spent many hours trying to debug this. Was my rewriting of the code wrong? Was the algorithm faulty in the first place? Was it the emulator? I had no idea. All I could do was systematically try different ideas as I thought of them, looking for patterns.
One pattern I noticed was to do with how many sprites I was drawing. If I drew one, there was no problem with it, but adding any more caused varying amounts of display artefacts to appear.
Breakthrough!
I had an idea! What happens if I change the timer value so that the timer interrupt fires more frequently? If my code is taking longer to run than the demo code, it makes sense the timer should have a shorter delay. Chasing the beam is timing dependent and if my code runs inconsistently, the tearing comes back. I have to use trial and error to find values for the timer that work properly. I’m calling it beam chasing, rather than beam racing because we’re always behind and trying to catch up to it. The amount of lag is the spare time we can use for doing our code. It’s not quite Atari 2600 levels of spewing out pixels exactly as the beam scans the screen.
Success!
And success! It worked! I’m sure I will need to come back and edit this timer value later and there will be a limit to how much processing can be squeezed in between each frame.
This code is really cool, I’m making a 2MHz CPU calculate and move data in the time it takes the CRT’s electron gun to go from the bottom of the screen back to the top. This is totally the kind of thing I was trying to learn.
And I learnt a valuable lesson
I learnt that given enough time and a bit of intuition, I can usually solve most problems. I’ve also had some very useful experience of what my students go through when I put something on the board and say “all you have to do is …”. It’s easy when you know the answer. Finding the answer is difficult and frustrating. And now I’ve had a good feeling of that frustration that comes with being so stuck you have no clue where to look or even how to work things out.
I’ll use this at work, and will make efforts to explain my thought processes to my students so they can understand how to figure out their own problems.


